Ultimate Definitive Manual for Euro-Pro SeamWeaver 101-854H & 101-548
Product Gallery

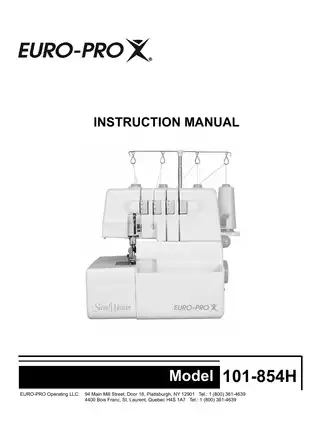
Sample pages from the Ultimate Definitive Manual for Euro-Pro SeamWeaver 101-854H & 101-548 manual


Purchase Information
Technical Specifications
- Document Number / Seller:
- 26213 / Carol Wilson
- File Size:
- 81.05 MB
- File Type:
- Language:
- English
- Pages:
- 51
- Printable:
- Yes
- Estimated Download Time:
- 1.66 Minutes
- Delivery Format:
- Digital (PDF) - Instant Access
- Category:
- Overlock Machine
- Brand:
- Euro
- Reviewed and Approved:
- Jan 3, 2026
Euro Models and Parts Covered in this Overlock Machine Manual
- EURO-PRO SeamWeaver 101-854H (2004-2005)
- EURO-PRO 101-548 (2004-2005)
- SeamWeaver Series (2004-2005)
Complete Manual Information
EURO-PRO SeamWeaver 101-854H Operators Manual - 2005 Edition
This technical instruction manual provides the critical operational parameters for the SeamWeaver high-speed serger system. Effective maintenance for maximum uptime requires the use of a high-grade sewing machine oil applied periodically to designated internal lubrication points to prevent friction-related component failure at the 1,300 spm maximum operating speed.
Technical Applicability & Model Generations
Household Serger Series: Multi-Thread Configurations
- Model 101-854H: Primary 2-3-4 thread technical series featuring differential feed and integrated waste management.
- Model 101-548: Secondary technical variant utilizing the same 2-3-4 thread architecture and 27 mm needle bar stroke.
Operational Safety & Maintenance Reliability
- Component Longevity: Adhering to the 500-hour rated load cycle ensures motor assembly integrity and electrical system stability.
- Service Accuracy: Precise needle alignment (right needle set slightly lower than left) is essential to prevent skip-stitching and mechanical interference.
- Uptime Optimization: Frequent removal of lint accumulation from the looper and knife area prevents secondary mechanical strain and maintains cut quality.
Document Architecture
- Print Number: Rev. 10/05 (Updated 2005)
- Page Count: 50 Pages
- File Format: PDF
Calibration Data & Factory Benchmarks
- Sewing Velocity: 1,300 stitches per minute (spm) maximum capacity.
- Needle System: 130/705H (Flat shank domestic standard) / Cat. No. 2045 #14.
- Needle Bar Stroke: 27 mm.
- Presser Foot Lift: 4.5 mm.
- Motor Duty Cycle: 500 hours under rated load (ON 7.5s / OFF 7.5s).
System Component Navigation
- Threading Interface: Four-zone color-coded path (Orange, Yellow, Green, Blue).
- Control Architecture: Lateral stitch length dial and differential feed adjustment lever.
- Cutting System: Dual-knife assembly with movable upper knife and stationary lower blade.
- Worksurface Conversion: Removable sewing table for free-arm (tubular) operation.
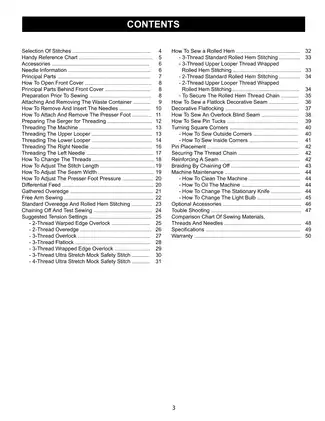
Table of Contents
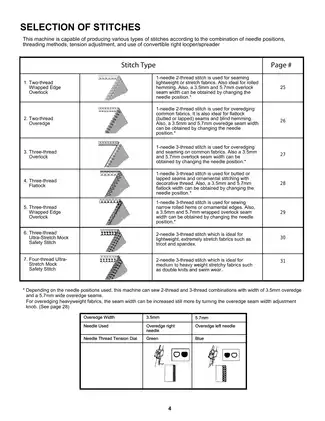
- Selection Of Stitches: Page 4
- Handy Reference Chart: Page 5
- Accessories & Needle Information: Page 6
- Principal Parts & Threading Order: Pages 7-17
- System Adjustments (Stitch, Width, Pressure): Pages 19-20
- Differential Feed & Gathered Overedge: Pages 20-21
- Stitch Tension Settings (2/3/4 Thread): Pages 25-32
- Rolled Hem & Flatlock Procedures: Pages 32-37
- Machine Maintenance (Cleaning, Oiling, Knife Replacement): Pages 44-45
- Trouble Shooting & Technical Specifications: Pages 47-49
Operational Limits & Specifications
- Stitch Length Range: 1 mm – 4 mm (Standard: 3 mm).
- Differential Feed Ratio: 1:0.7 – 1:2.0.
- Overedge Seam Width: 3.0 mm – 7.7 mm (Standard: 3.5 mm).
- Rolled Hemming Width: 1.5 mm.
- Electrical Requirements: 110-127V, 15W (Lamp Type: Bayonet BA15D/19).
FAQ
Which specific EURO-PRO SeamWeaver models and production variants are covered in this manual? This documentation provides technical coverage for the SeamWeaver 101-854H and 101-548 models produced around the 2004-2005 period. The instructions are specifically designed for these 2-3-4 thread household serger configurations, ensuring that users can correctly identify components like the movable upper knife and color-coded threading paths unique to this series.
What are the primary technical specifications for the motor and sewing velocity? The system is engineered to reach a maximum sewing speed of 1,300 stitches per minute (spm) and utilizes a motor assembly with a rated duty cycle of 500 hours. It operates on a standard 110-127V electrical supply and requires a specific BA15D/19 bayonet-type 15W light bulb for the integrated workspace illumination.
Does this manual include detailed threading schematics and tension configurations for different stitch types? Yes, the manual features a comprehensive threading interface guide using a four-zone color-coded path (Orange, Yellow, Green, and Blue). It details specific tension settings for various operations, including the 3-thread overlock, 2-thread flatlock, and the specialized rolled hemming procedure, which requires a specific stitch width of 1.5 mm.
What maintenance procedures are required to ensure the longevity of the cutting and feed systems? Maintenance reliability is maintained through periodic lubrication of internal points with high-grade sewing machine oil and the regular replacement of the dual-knife assembly. The manual specifies that the lower knife is stationary while the upper knife is movable, and the differential feed system must be calibrated between ratios of 1:0.7 and 1:2.0 to prevent fabric puckering or stretching during high-speed operation.
Can I utilize this digital manual to quickly troubleshoot specific mechanical issues during a repair? The digital format provides immediate access to the "Trouble Shooting" section on page 47, which identifies causes for common technical failures such as needle breakage, skipped stitches, and thread snapping. Users can instantly print the "Handy Reference Chart" from page 5 or the "Selection of Stitches" guide from page 4 to have physical technical benchmarks available at the workstation.
Download Instructions for Euro Overlock Machine Manual
Frequently Asked Questions - Euro Overlock Machine Manual
Is this manual suitable for beginners?
Yes, this Euro manual is designed for both professional technicians and DIY enthusiasts. It includes step-by-step procedures with clear illustrations and safety guidelines for Overlock Machine maintenance and repair.
What file format will I receive?
You will receive this manual as a PDF file (81.05 MB), which is compatible with all devices. The manual is fully searchable and printable for your convenience.
How quickly can I access the manual after purchase?
You'll receive instant access to your Euro Overlock Machine manual immediately after payment completion. The download link is valid for 3 days, with lifetime re-download guarantee.
Can I print specific sections of the manual?
Absolutely! This digital manual allows you to print any section you need, from individual pages to complete chapters, making it perfect for workshop use.
Customer Reviews and Feedback
Read what our customers say about this Euro Overlock Machine manual and share your own experience.
Add Comment
This policy contains information about your privacy. By posting, you are declaring that you understand this policy:
- Your name, rating, website address, town, country, state and comment will be publicly displayed if entered.
- Aside from the data entered into these form fields, other stored data about your comment will include:
- Your IP address (not displayed)
- The time/date of your submission (displayed)
- Your email address will not be shared. It is collected for only two reasons:
- Administrative purposes, should a need to contact you arise.
- To inform you of new comments, should you subscribe to receive notifications.
- A cookie may be set on your computer. This is used to remember your inputs. It will expire by itself.
This policy is subject to change at any time and without notice.
These terms and conditions contain rules about posting comments. By submitting a comment, you are declaring that you agree with these rules:
- Although the administrator will attempt to moderate comments, it is impossible for every comment to have been moderated at any given time.
- You acknowledge that all comments express the views and opinions of the original author and not those of the administrator.
- You agree not to post any material which is knowingly false, obscene, hateful, threatening, harassing or invasive of a person's privacy.
- The administrator has the right to edit, move or remove any comment for any reason and without notice.
Failure to comply with these rules may result in being banned from submitting further comments.
These terms and conditions are subject to change at any time and without notice.
Comments (1)