- 2011 KTM Duke 125
- 2012 KTM Duke 125
- 2013 KTM Duke 125
- 2014 KTM Duke 125


2011-2014 KTM Duke 125 repair manual
Includes the following models
File specifications
File type: ZIP
Language: English
Printable: Yes
Estimated download time: 0.86 Minutes
$18.99
Pay with Bitcoin
Product Information
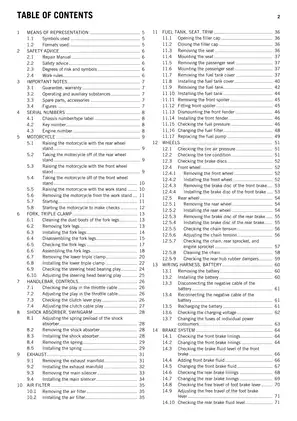
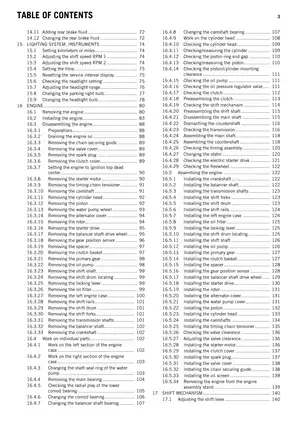
Table of Contents
1. MEANS OF REPRESENTATION
- 1.1 Pictograms
- 1.2 Target Group
- 1.3 Reference Symbols
2. SAFETY ADVICE
- 2.1 Danger
- 2.2 Warning
- 2.3 Note
- 2.4 Environment
3. IMPORTANT NOTES
- 3.1 Correcting Faults
- 3.2 Replacing Assembly Substances
4. SERIAL NUMBER LOCATIONS
- 4.1 Vehicle Identification Number
- 4.2 Engine Number
5. MAINTENANCE
- 5.1 Removing the Motorcycle with the Rear Wheel
- 5.2 Lifting the Motorcycle with the Front Wheel
- 5.3 Removing the Motorcycle with the Rear Wheel Stand
- 5.4 Mounting the Motorcycle with the Rear Wheel Stand
- 5.5 Removing the Motorcycle with the Front Wheel Stand
- 5.6 Mounting the Motorcycle with the Front Wheel Stand
- 5.7 Removing the Fairing
- 5.8 Removing the Fairing
- 5.9 Removing the Front Fender
- 5.10 Mounting the Front Fender
6. REMOVING AND INSTALLING THE FORK LEGS
- 6.1 Removing the Fork Legs
- 6.2 Installing the Fork Legs
7. REMOVING AND INSTALLING THE FORK
- 7.1 Removing the Fork
- 7.2 Installing the Fork
8. REMOVING AND INSTALLING THE STEERING HEAD BEARINGS
- 8.1 Removing the Steering Head Bearings
- 8.2 Installing the Steering Head Bearings
9. REMOVING AND INSTALLING THE SHOCK ABSORBER
- 9.1 Removing the Shock Absorber
- 9.2 Installing the Shock Absorber
10. REMOVING AND INSTALLING THE SWING ARM
- 10.1 Removing the Swing Arm
- 10.2 Installing the Swing Arm
11. FUEL TANK, SEAT, TRIM
- 11.1 Opening the Filler Cap
- 11.2 Closing the Filler Cap
- 11.3 Removing the Fuel Tank
- 11.4 Installing the Fuel Tank
- 11.5 Removing the Rider's Seat
- 11.6 Installing the Rider's Seat
- 11.7 Removing the Passenger Seat
- 11.8 Installing the Passenger Seat
- 11.9 Removing the Side Trim
- 11.10 Installing the Side Trim
- 11.11 Removing the Front Trim
- 11.12 Installing the Front Trim
- 11.13 Removing the Tail Unit
- 11.14 Installing the Tail Unit
- 11.15 Removing the Headlight
- 11.16 Installing the Headlight
- 11.17 Removing the Rear Fender
- 11.18 Installing the Rear Fender
12. REMOVING AND INSTALLING THE BATTERY
- 12.1 Removing the Battery
- 12.2 Installing the Battery
13. ELECTRICAL SYSTEM
- 13.1 Removing the Alternator Cover
- 13.2 Installing the Alternator Cover
- 13.3 Checking the Alternator
- 13.4 Checking the Starter Relay
- 13.5 Checking the Fuse
14. BRAKE SYSTEM
- 14.1 Removing the Front Brake Disc
- 14.2 Installing the Front Brake Disc
- 14.3 Removing the Rear Brake Disc
- 14.4 Installing the Rear Brake Disc
- 14.5 Removing the Front Brake Caliper
- 14.6 Installing the Front Brake Caliper
- 14.7 Removing the Rear Brake Caliper
- 14.8 Installing the Rear Brake Caliper
- 14.9 Removing the Front Brake Pads
- 14.10 Installing the Front Brake Pads
- 14.11 Removing the Rear Brake Pads
- 14.12 Installing the Rear Brake Pads
- 14.13 Bleeding the Front Brake System
- 14.14 Bleeding the Rear Brake System
- 14.15 Checking the Front Brake Fluid Level
- 14.16 Checking the Rear Brake Fluid Level
15. LIGHTING SYSTEM, INSTRUMENTS
- 15.1 Removing the Headlight
- 15.2 Installing the Headlight
- 15.3 Adjusting the Headlight
- 15.4 Removing the Taillight
- 15.5 Installing the Taillight
- 15.6 Adjusting the Taillight
- 15.7 Removing the Turn Signal
- 15.8 Installing the Turn Signal
- 15.9 Adjusting the Turn Signal
- 15.10 Checking the Lighting System
- 15.11 Checking the Instrument Display
- 15.12 Adjusting the Instrument Display
16. ENGINE
- 16.1 Removing the Engine
- 16.2 Installing the Engine
- 16.3 Disassembling the Engine
- 16.4 Assembling the Engine
- 16.5 Checking the Engine
17. SHIFT MECHANISM
- 17.1 Adjusting the Shift Mechanism
- The price of this manual, handbooks, and repair guides is not set by [RL] marketplace, but by the seller of the manuals themselves, so it is possible that the same manual is offered at a different price on another page here. Please compare prices before deciding to purchase.
- For many of our manuals, there are comments and ratings from other users at the end of the detail page to make your purchase decision easier. Please leave a review after your purchase to help other users make their purchasing decision.
- Don't hesitate and download the repair manual you need now. You get a lifetime guarantee for the download, as described in our FAQs https://www.repairloader.com/faq.php.
- To contact the seller of the manual, please use our contact form https://www.repairloader.com/contact.php and we will forward your request or take care of it directly
How to Download Your Manual - Delivery Policy
Within a minute after completing the payment process, you will receive two emails from us. One for the completed payment and another with the download link. The download link is valid for 3 days.
Lifetime Guarantee
Manuals frequently bought together
2013-2014 KTM 390 Duke EU, 390 Duke AUS, 390 Duke MAL, 390 Duke COL repair manual
- KTM 390 Duke EU
- 390 Duke AUS
- 390 Duke MAL
- 390 Duke 2014 COL
- KTM 390 Duke 2014 COL
- 2013 KTM 390 Duke EU
- 2013 KTM 390 Duke AUS
- 201
2012-2014 Range Rover Sport TDV6 3.0L Diesel, V6 S/C 3.0L petrol, V8 5.0L petrol, V8 S/C 5.0L petrol repair manual
- TDV6 3.0L Diesel: Entry-level diesel model offering efficiency and performance
- V6 S/C 3.0L Petrol: Supercharged V6 petrol model providing a balance of power and efficiency
- V
2012-2014 Ford Escape manual
- Ford Escape S
- Ford Escape SE
- Ford Escape SEL
- Ford Escape Titanium
Engine: 2.5L Duratec, 1.6L Ecoboost and 2.0L Ecoboost
Production/model years:
Add Comment
Insert Bullet List
Please enter at least one item.
Item:
Item:
Item:
Item:
Item:
Insert Numeric List
Please enter at least one item.
Item:
Item:
Item:
Item:
Item:
Insert Link
Please enter the link of the website
Optionally you can add display text
Insert Email
Please enter the email address
Optionally add any display text
Insert Image
Please enter the link of the image
Insert YouTube Video
Please enter the link of the video
Privacy Policy
This policy contains information about your privacy. By posting, you are declaring that you understand this policy:
- Your name, rating, website address, town, country, state and comment will be publicly displayed if entered.
- Aside from the data entered into these form fields, other stored data about your comment will include:
- Your IP address (not displayed)
- The time/date of your submission (displayed)
- Your email address will not be shared. It is collected for only two reasons:
- Administrative purposes, should a need to contact you arise.
- To inform you of new comments, should you subscribe to receive notifications.
- A cookie may be set on your computer. This is used to remember your inputs. It will expire by itself.
This policy is subject to change at any time and without notice.
Terms and Conditions
These terms and conditions contain rules about posting comments. By submitting a comment, you are declaring that you agree with these rules:
- Although the administrator will attempt to moderate comments, it is impossible for every comment to have been moderated at any given time.
- You acknowledge that all comments express the views and opinions of the original author and not those of the administrator.
- You agree not to post any material which is knowingly false, obscene, hateful, threatening, harassing or invasive of a person's privacy.
- The administrator has the right to edit, move or remove any comment for any reason and without notice.
Failure to comply with these rules may result in being banned from submitting further comments.
These terms and conditions are subject to change at any time and without notice.
{"commentics_url":"\/\/www.repairloader.com\/comments\/","page_id":120349,"enabled_country":false,"country_id":0,"enabled_state":false,"state_id":0,"enabled_upload":false,"maximum_upload_amount":3,"maximum_upload_size":5,"maximum_upload_total":5,"captcha":true,"captcha_url":"https:\/\/www.repairloader.com\/comments\/frontend\/index.php?route=main\/form\/captcha&page_id=120349","cmtx_wait_for_comment":"cmtx_wait_for_comment","lang_error_file_num":"A maximum of %d files are allowed to be uploaded","lang_error_file_size":"Please upload files no bigger than %.1f MB in size","lang_error_file_total":"The total size of all files must be less than %.1f MB","lang_error_file_type":"Only image file types are allowed to be uploaded","lang_text_loading":"Loading ..","lang_placeholder_country":"Country","lang_placeholder_state":"State","lang_text_country_first":"Please select a country first","lang_button_submit":"Add Comment","lang_button_preview":"Preview","lang_button_remove":"Remove","lang_button_processing":"Please Wait.."}
{"commentics_url":"\/\/www.repairloader.com\/comments\/","language":"english"}
Comments